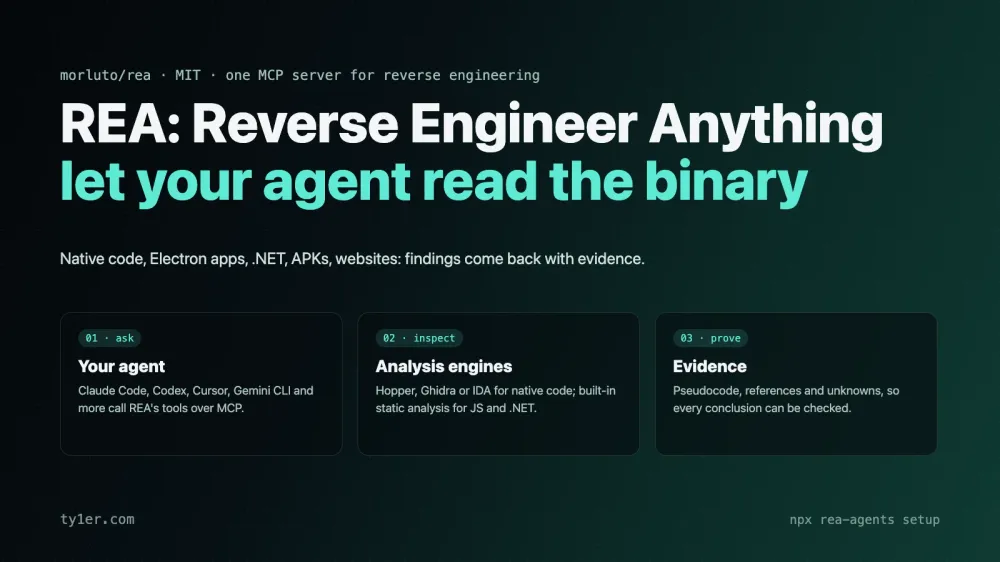
You see a feature in an app and wonder how it works. The source code isn't available, so you'd normally open a disassembler, dig through thousands of functions, and piece the answer together yourself. REA: Reverse Engineer Anything hands that work to your AI coding agent. It's an open-source MCP server that connects agents such as Claude Code, Codex, and Cursor to real reverse-engineering tools, then returns findings together with the evidence behind them.
This post covers what REA does, how it fits together, what it can analyze, and how to set it up, plus the legal ground rules you should know before pointing it at someone else's software. Details were checked against the project's README, installation guide, and agent skill for rea-agents 6.4.0 (released October 11, 2026). I haven't run it against a target for this post, so everything here comes from the project's own documentation.
At a glance
- What it is: “One MCP for reverse engineering across binaries, applications, and runtime behavior,” plus a
reacommand-line tool that uses the same workflows. - License: MIT, written in TypeScript, published on npm as
rea-agents. - Popularity: nearly 90,000 GitHub stars six months after the repository was created in April 2026.
- Agents: setup configures 17 clients, including Claude Code, Claude Desktop, Codex, Cursor, Gemini CLI, GitHub Copilot CLI, VS Code, and Windsurf. Any agent that supports local MCP servers can use it with manual registration.
- Engines: Hopper, Ghidra, or IDA for native code. JavaScript, Electron, and .NET analysis needs no engine at all.
- Privacy: analysis runs on your machine. Your agent's model provider still sees the tool results, under its own data policy.
- Requirements: Node.js 22.x (22.19 or later), 24.x (24.11 or later), or 26+, plus npm. Node.js 23, 25, and prereleases aren't supported.
How REA works
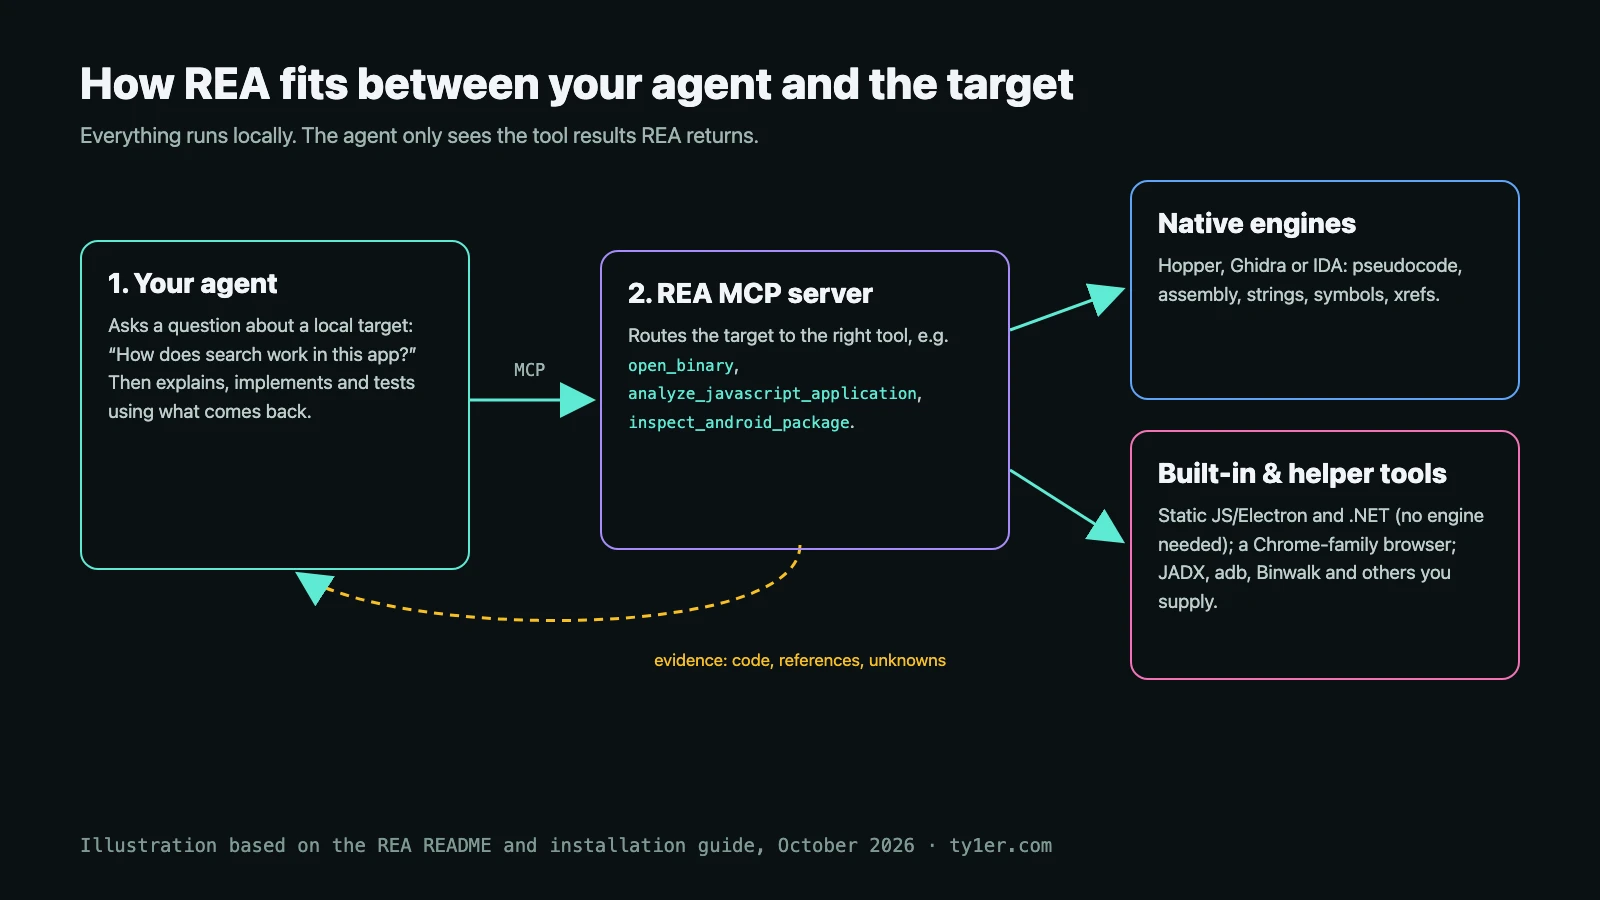
Your agent calls REA's tools through the Model Context Protocol. REA picks a route based on the target: open_binary for native executables and archives, analyze_javascript_application for an Electron app or ASAR file, inspect_managed_artifact for a .NET assembly, inspect_android_package for an APK, and so on. It drives the engine, then returns what it found: pseudocode, assembly, references, module graphs, and, importantly, what it couldn't determine.
That last part is the project's main idea. Every result carries its evidence and limitations, so the agent (and you) can tell a confirmed fact from an inference. The agent then uses those findings to answer follow-up questions, explain the behavior, or write and test its own implementation.
Setup also installs a skill, a set of workflow instructions that tells the agent when to use REA and which tool to start with. The skill is explicit that REA is for shipped artifacts. For ordinary analysis of a source repository you already have, it tells the agent to use normal repository tools instead.
What REA can analyze
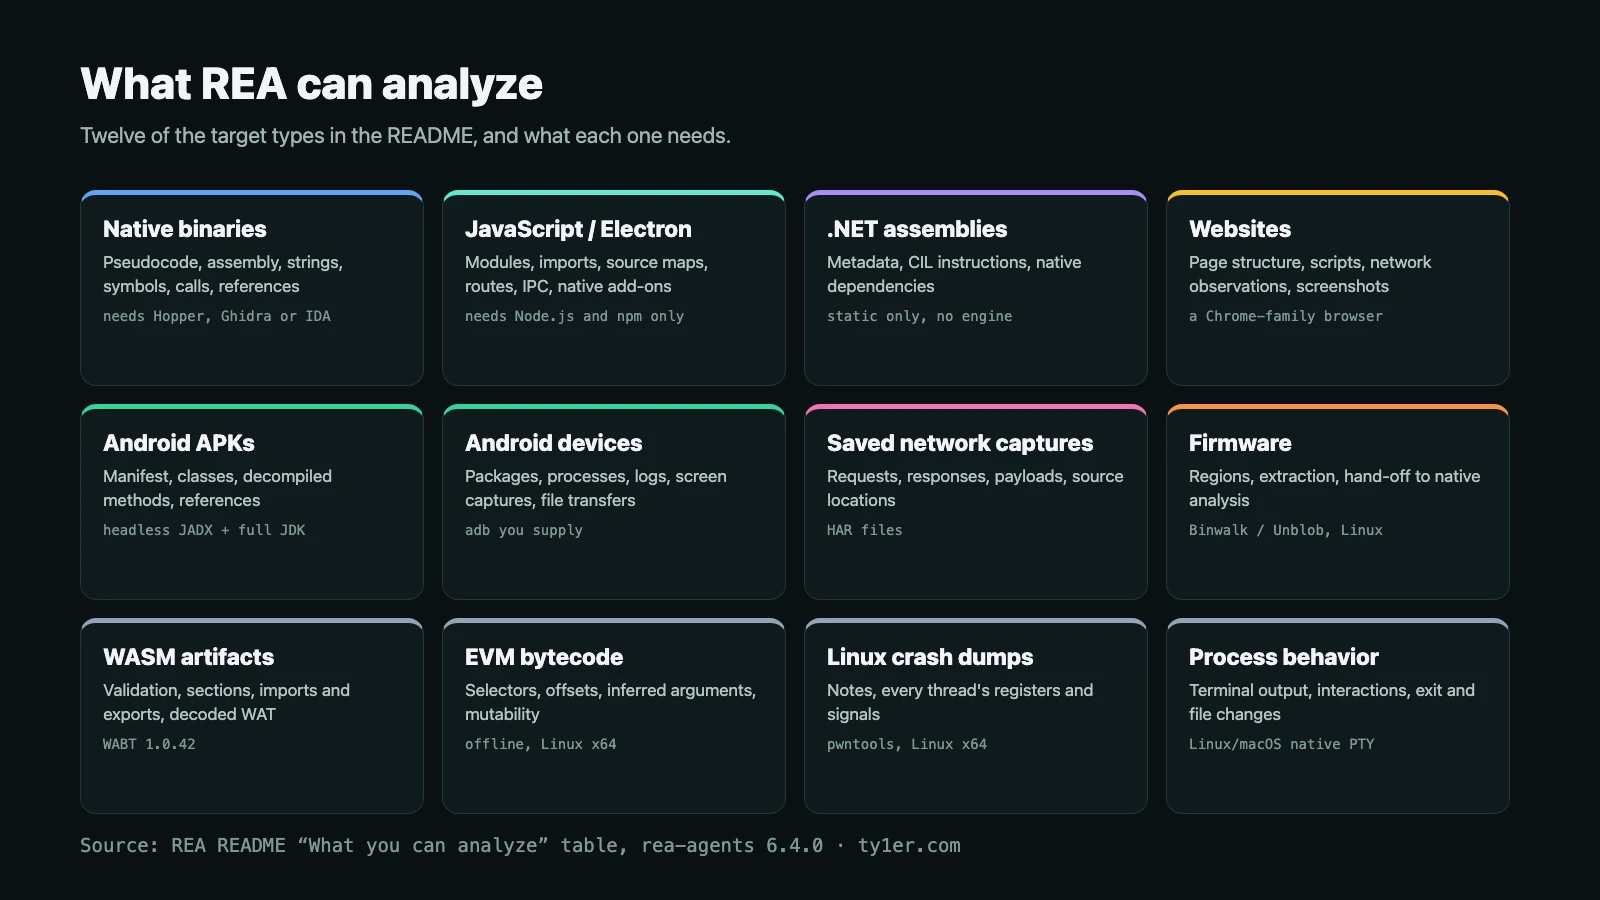
The README lists a few more besides these: offline ELF layout, JEB projects, decoded Android resources through Apktool, and package inventories such as Apple app bundles and plists. Two points are worth knowing up front:
- Static versus runtime. Static JavaScript and .NET inspection only read the files you give them; they don't run the app. Runtime capture does run or interact with the target, using your user permissions, and each runtime guide describes its effects.
- Bring your own tools. REA never installs unrelated software such as Java, Ghidra, IDA, JADX, Binwalk, or even Node.js. The one exception is Hopper, which setup can install for you on macOS and supported Linux distributions after you approve it.
Quick start
With a supported Node.js and npm installed, run setup:
npx rea-agents setupPick your agents, review the proposed changes, and approve them. Setup adds REA's MCP server and the matching skill, backing up any existing configuration first. Restart your agent afterward so it loads the new tools.
If you'd rather see exactly what will change before anything happens, use a dry run for one client. These options are documented in the installation guide; claude_code is Claude Code's client ID:
npm install --global rea-agents
rea setup --client claude_code --dry-run --json
rea setup --client claude_code --yes --json
rea doctor --client claude_code --json
rea doctor is read-only. It checks the host, agent registrations, the installed skill, and analysis engines. To check a single engine, use rea doctor --provider ghidra --json (or hopper or ida).
For a client setup doesn't cover, register the server by hand. The installation guide recommends pinning one exact version:
{
  "mcpServers": {
    "rea": {
      "command": "npx",
      "args": ["-y", "rea-agents@6.4.0", "mcp"]
    }
  }
}
Asking your agent
Once REA is registered, you talk to your agent normally. The README's example prompt is a good template:
Understand how search works in the Notes app, show me the evidence, and build a
similar feature for my project.
Swap in your target app and feature. Name the app or give a path: the skill tells the agent to ask which app you mean rather than guess, and never to pick an example app on your behalf. A few more ideas in the same spirit:
- “Open the Electron app at
/Applications/MyTool.appand trace how its renderer talks to the main process over IPC.” - “Compare version 2.3 and 2.4 of my own library's compiled DLL and tell me which exported functions changed.”
- “Inspect this APK from our build pipeline and list every permission and exported activity in its manifest.”
Using the terminal
You don't need an agent to use REA. JavaScript and Electron analysis works straight from the shell, with no analysis engine:
npx -y rea-agents@latest analyze-javascript-application /absolute/path/to/app --jsonThe JSON result includes modules, imports, Electron boundaries, and the evidence for each. For native analysis from the CLI, configure a provider first; the project's CLI and Evidence guide covers native commands, provider selection, snapshots, and scripting.
Choosing a native analysis engine
- Hopper is commercial software with a free demo that has vendor-defined limits. REA starts it when needed, and setup can download, verify, and install it after approval: on macOS, to
~/Applications/Hopper Disassembler.app, without Homebrew or administrator access. On first run, Hopper may ask you to choose demo mode or enter a license. - Ghidra is free and open source from the NSA. REA expects an existing Ghidra 12.1.x install with the native decompiler for your platform and a 64-bit JDK 21 or newer. Point REA at it with
GHIDRA_INSTALL_DIR, and optionallyJAVA_HOME. The adapter exposes 25 read-only operations, covering decompilation, assembly, cross-references, data types, and more. Windows support is experimental. For large binaries, raise the startup deadline withREA_GHIDRA_STARTUP_TIMEOUT_MS. - IDA works through the existing ida-pro-mcp integration, using your own IDA installation and license.
If you're starting from scratch and want something free, Ghidra is the natural choice. If you're on a Mac and want the least setup, Hopper's demo through REA's guided install is the shortest path.
export GHIDRA_INSTALL_DIR=/absolute/path/to/ghidra_12.1.4_PUBLIC
export JAVA_HOME=/absolute/path/to/jdk-21
rea doctor --provider ghidra --json
Real examples
The project publishes three worked case studies on rea.tools:
- DX-Ball: following a sound call into its position-to-pan helper and reconstructing it in C. The README says the reconstruction passes 3,205 original-x86 test cases and reproduces all 63 compiled function bytes.
- Notion: tracing the Electron clipboard bridge from the renderer's clipboard API, through preload and IPC, into the main process.
- TH04: recovering a bullet-ring calculation from a 16-bit PC-98 DOS game and comparing the reconstructed C++ against historical compiler output.
These show the realistic shape of the work. REA doesn't magically hand back original source code. It gives the agent pseudocode, assembly, and references, and the agent does the reconstruction and testing on top of that evidence.
Use it legally and ethically
REA's own disclaimer is short: it's for “lawful reverse-engineering research, analysis, and reconstruction,” and you're responsible for getting any authorization you need and following applicable law. In practice, that means:
- Good fits: your own software and builds; software you're authorized to test in a security engagement; CTF challenges; malware analysis in an isolated lab; interoperability work; and recovering how an abandoned program you own behaved.
- Read the license first. Many commercial end-user license agreements restrict reverse engineering, and some countries' laws limit bypassing copy protection. Rules differ by country and use case, so if a project matters, check before you start.
- Learn the idea, don't copy the code. The README's pitch is understanding how a feature works and building a version for your project. Re-implementing a behavior is very different from pasting decompiled code into your product.
- Remember your model provider. Analysis is local, but the pseudocode and strings REA returns go to your agent's model. Don't run it on confidential binaries if your provider's data policy doesn't allow that.
One more warning from the project itself: REA hasn't issued or endorsed any cryptocurrency, and tokens using the REA name aren't affiliated with it.
Updating and uninstalling
REA changes quickly, and new releases often fix bugs, so update before reporting a problem. For a global install:
rea updateIf you used npx, rerun npx rea-agents@latest setup, review the changes, and restart your agent. To remove it:
rea uninstall
rea uninstall --purge-data
Uninstall removes only REA's own agent registrations and skill files; --purge-data also clears REA's cache and state under ~/.rea. It leaves Hopper, Node.js, your evidence files, captures, other skills, and other MCP servers alone.
Links
- github.com/morluto/rea: source code, README, and issues.
- rea.tools guides: illustrated walkthroughs for native, JavaScript, and browser analysis.
- Installation and setup: every supported agent, engine setup, and troubleshooting.
- rea-agents on npm: release versions.
New to driving tools from an agent? See Claude Code and the iOS Simulator on macOS for another example of giving Claude Code hands-on access to your machine.